Sunday, March 28, 2021

Smart, sweet and salty

Happy Spring! It's been a busy few months.  We were so deeply saddened to say goodbye to this guy, who we had to let go after 15 wonderful years in the family.  


 Then doug and I got out of town and lived and worked in Boulder, CO for three weeks, leaving the day before that horrible tragedy occurred.  

But I've been dying to write about my Breville!!  As you know from my prior post, I got a new cast iron skillet for Christmas.  I am still in love with it.  But I got a few other toys that have been no less revolutionary.  First, a new set of measuring spoons. Why did it take me ten years to do this?  I had been getting by with like two janky melted mismatched tools.  These are great, they're magnetic so nestle together in the drawer, and the set includes the tiniest of sizes and the 3/4 tsp, which is key.

I also got a new Ninja mini chopper.  Similar to the mini Cuisinart, which I love, but this sucker has two blades and pulverizes in like two seconds.  It's a keeper. 


Next, for the Schitt's Creek fans out there, you know how epic this cutting board from Doug is!!


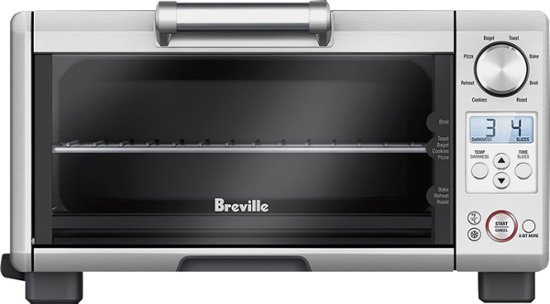
But this one? This is the motherlode. The Breville Smart Oven.  I got a mini, since it sits on the counter and our family is smaller now, but it is one of these tools that I instantly don't know how I survived without it.  


It is an oven and a toaster all in one, but so much more than the toaster oven of yore.  It's powerful, cooks evenly and remembers your settings for everything.  You can straight up cook in it:  it is incredibly versatile and cooks everything perfectly.  I've broiled salmon, baked brownies, toasted bread, heated tortillas, and roasted a chicken, just to name a few. Everything turns out perfectly.


Lastly, yesterday I made some extraordinarily delicious brownies:  salted pretzel brownies.   Melissa D'Arabian strikes gold again - it's a salty brownie on top of a graham cracker crust and it. is. gooooood.


First you make and bake the graham cracker crust.  Use your Breville ha ha.


Then you make the brownies and dump them in the baked crust.

Top with a few pretzels and bake away.


INGREDIENTS

FOR THE CRUST:

  • ½ cup/115 grams unsalted butter (1 stick), melted, plus more for greasing the pan
  • 1 cup/120 grams graham cracker crumbs (from about 7 graham cracker sheets)
  • ½ cup/30 grams finely crushed pretzels
  • 1 egg white

FOR THE BROWNIES:

  • ½ cup/115 grams unsalted butter (1 stick)
  • 4 ounces/115 grams unsweetened chocolate, coarsely chopped or broken up
  • 1 ¼ cups/250 grams granulated sugar
  • 2 large eggs, at room temperature
  • ½ cup/65 grams all-purpose flour
  • 2 tablespoons Dutch-processed cocoa powder
  • 2 teaspoons vanilla extract
  • ¾ teaspoon fine sea salt
  •  cup/60 grams mini or regular chocolate chips (optional)
  •  Small whole pretzels, for topping the brownies

PREPARATION

  1. Heat oven to 350 degrees. Lightly butter an 8-inch square metal baking pan and line it with parchment paper, leaving about 2 inches of excess on each side to help you lift the cooked brownies out of the pan.
  2. Make the crust: In a food processor, combine butter, graham cracker crumbs, crushed pretzels and egg white. Process until mixture is well blended. Transfer to prepared pan and press crumb mixture into an even layer on the bottom. Bake until deeply browned at the edges, about 14 to 17 minutes. Transfer pan to a wire rack to cool.
  3. Make the brownies: Raise oven temperature to 400 degrees. Put butter and chocolate into a medium pot and place it over low heat. Melt the mixture, taking care not to let the chocolate burn and stirring constantly with a rubber spatula until smooth. Scrape chocolate mixture into a large bowl and mix in the sugar. Let mixture cool until it’s just warm to the touch, about 5 minutes.
  4. Whisk eggs into cooled chocolate mixture. Whisk in flour, cocoa powder, vanilla and salt. Mix in chocolate chips, if using.
  5. Scrape batter into an even layer on top of the crust. Top with pretzels and bake until the top is set and firm to touch, especially in the center, 20 to 25 minutes. Transfer the pan to a wire rack to cool completely before cutting into 16 squares.

Try them - they're fab.  Enjoy this time of year!


Monday, January 25, 2021

Iron

A Cast Iron Skillet.  It was a staple in my grammy's kitchen. She made her Irish Soda bread in it.  It sat there, solid and beautiful, on her white enamel range.  My parents, too, kept one sitting on the stove top. Julie has one. I have visited her dozens of times over the years, and love to use it when cooking at her house. Every time I do I think, why don't I have one of these?  Well, now I do.

Meet my favorite Christmas present, my new kitchen toy, my 12" cast iron, forged by Smithey.

She is a beaut and I love her.  
I feel so stupid I didn't have one earlier - cast iron skillets are amazingly versatile.
Being me, I researched different models and read a bunch of reviews and settled on Smithey.

Isn't that nice?  Thank you, Isaac!

So what's the deal with cast iron cookware, you ask?

According to Southern Kitchen
The oldest cast iron artifacts date from early 5th century B.C China, in the Jiangsu province, and such tools were widely used in the region by the 3rd century B.C. Cast iron slowly made its way to Western Europe, likely via the Silk Road, and wasn’t an important material until the 14th centuryA.D.

In Europe, it was mainly used for artillery until the 1700s, when it started to be used for bridges and building construction, as well as for cooking pots. Englishman Abraham Darby is credited with revolutionizing cast iron cookware; in 1707, he patented a method for casting iron into relatively thin pots and kettles, a process that made them cheaper to produce. With three feet on the base and a heavy, handled lid, these early pots were used for cooking over live fire and were most akin to the types of Dutch ovens used today for outdoor cooking.

As indoor kitchen stoves became more and more widespread throughout the late 18th and mid-19th centuries, cookware began to evolve as well, and flat-bottomed cast iron skillets became essential pieces of cookware in both Europe and America. Industrialized manufacturing also helped the spread of cast iron cookware, as these skillets and pots became cheaper and cheaper to produce. Towards the end of the 19th century, three iconic American cast iron cookware brands were founded, cementing the pan’s popularity across the country.


In other words, I am long overdue.  
What I love about this tool is it looks amazing, you can cook just about anything in it, you can bake in it, it is easy to clean and never needs to be put away.  Boom.

I made a rockin Shepherd's Pie, which you can cook up right in the darn thing


And one of our family favorites:  
Chicken Piccata Pasta Toss (full recipe below)

(or as Dylan used to call it as a little kid, "slimy chicken pasta"
season chicken with salt & pepper and brown in olive oil for 5-6 minutes
 
Remove chicken from pan
Heat butter &  olive oil and cook garlic and shallots for 3 minutes

Stir in flour and cook two minutes

Whisk in wine and reduce liquid, 1 minute.  Whisk lemon juice and broth into sauce

Stir in capers & parsley.  
When it comes to a boil, add a little more butter and add chicken back in.

Heat it all up, add to hot pasta and enjoy


Last but not least, I would like to introduce you to my new favorite cocktail, the Corpse Reviver No. 2.  
Thank you, Rebecca Fenneman

Corpse Reviver No. 2

  • Absinthe, to rinse
  • 3/4 ounce London dry gin
  • 3/4 ounce Lillet blanc
  • 3/4 ounce orange liqueur
  • 3/4 ounce lemon juice, freshly squeezed
  • Rinse the inside of a chilled coupe or cocktail glass with absinthe, discard the excess and set the glass aside.

  • Add the gin, Lillet blanc, orange liqueur and lemon juice into a shaker with ice and shake until well-chilled.

  • Strain into the prepared glass.


Chicken Piccata Pasta Toss

2 TBS olive oil
1-1/3 lb chicken breast tenders, cut into 1 inch pieces
salt & pepper
1-1/2 Tbsp butter
4 cloves chopped garlic
2 chopped shallot
2 Tbsp all purpose flour
1/2 cup wine
1 lemon, juice
1 cup chicken broth
3 Tbsp capers, drained
1/2 cup flat leaf parsley, chopped
1 lb penne pasta, cooked al dente

  1. Heat a deep nonstick skillet over medium high heat. Add a tablespoon of extra-virgin olive oil and the chicken to the pan. Season chicken with salt and pepper. Brown chicken until lightly golden all over, about 5 to 6 minutes. Remove chicken from pan and return the skillet to the heat. Reduce heat to medium. Add another tablespoon extra-virgin olive oil and 1 tablespoon butter, the garlic and shallots to the skillet. Saute garlic and shallots 3 minutes. Add flour and cook 2 minutes. Whisk in wine and reduce liquid 1 minute. Whisk lemon juice and broth into sauce. Stir in capers and parsley. When the liquid comes to a bubble, add remaining 1/2 tablespoon butter to the sauce to give it a little shine. Add chicken back to the pan and heat through, 1 to 2 minutes. Toss hot pasta with chicken and sauce and serve. Adjust salt and pepper, to your taste. Top with fresh snipped chives.